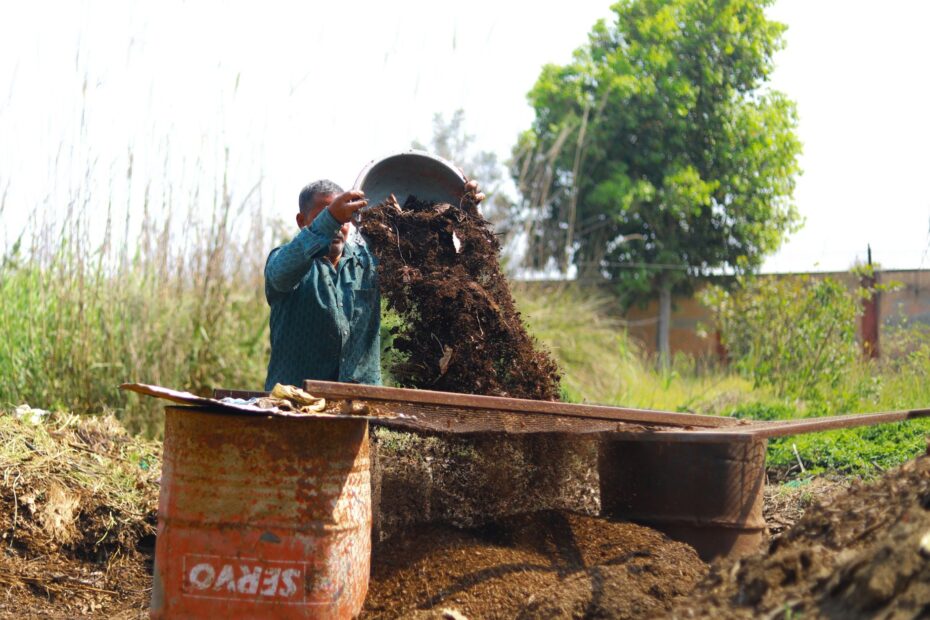
In an active pile, microorganisms turn food scraps and yard trimmings into stable organic matter with oxygen, moisture, carbon, and nitrogen. Your pile supplies those conditions, and the material gradually becomes dark, crumbly finished compost that helps soil hold water and air.
This practical explanation covers pile biology, material choices, home systems, timing, common setbacks, and safe soil use for backyard gardeners, renters, and households with small scrap volumes.
Organic Matter Becomes a Stable Soil Amendment
Banana peels, coffee grounds, dry leaves, and grass clippings do not become useful compost by sitting in a heap. Microorganisms consume organic matter in an oxygen-rich pile, leaving a stable material that blends into soil instead of continuing to rot.
Kitchen scraps and yard trimmings contain carbon, nitrogen, and water that could otherwise enter a trash bag. Buried food waste breaks down with little oxygen in a landfill and releases methane. Composting keeps more of that material in a useful local cycle.
Finished Compost Changes Soil Structure
Adding mature material helps sandy soil retain water and helps dense clay form small air spaces. Your garden soil drains more evenly, resists crusting, and gives plant roots room to spread through the root zone.
Organic matter also holds nutrients until soil life releases them. Compost is not a full substitute for fertilizer or potting mix, yet it gives your existing soil a stronger setting for roots, water movement, and nutrient movement.
Small Home Systems Have Limits
Space, weather, and your routine shape the result. A small bin slows during winter, while an overloaded container full of wet scraps can smell sour or draw pests.
A flawless routine is not necessary. Keep dry carbon-rich browns nearby, leave room for oxygen, and correct wet pockets before food waste turns into a dense, sour mass.
Those safeguards preserve the oxygen and moisture balance that lets decomposers work without creating odors.
Microorganisms Drive the Changes Inside the Pile
Heat from a fresh heap shows that bacteria are consuming available material quickly. Their activity releases heat, and a large active mass can become warm enough to steam on a cool morning.
Fungi, bacteria, actinomycetes, mites, and earthworms take part at different stages. Bacteria handle soft food scraps early, while fungi work through tougher stems, leaves, and woody pieces later in the composting process.
Five Conditions Keep Microbes Active
- Carbon fuel: Dry leaves, paper, and straw feed microorganisms while keeping the pile loose.
- Nitrogen growth: Food scraps, coffee grounds, and fresh clippings supply nitrogen for microbial growth.
- Oxygen flow: Air spaces keep aerobic decomposition active and limit sour odors from oxygen-starved material.
- Moisture balance: Damp surfaces help microbes feed without filling the air pockets with water.
- Moderate warmth: Warm conditions speed activity, while frozen material waits for milder weather.
A dry, dusty heap lacks water. A glossy, slimy heap has too much moisture and too little oxygen. Your pile is moving well when it feels loose and smells like damp soil or a forest floor.
Turn material that smells like sewage or rotten eggs. That odor points to anaerobic decay, where compacted wet ingredients have pushed oxygen out of the pile.
Carbon-Rich Browns Keep Nitrogen-Rich Greens Open
Melon rinds and grass clippings can collapse into a wet mat because they carry substantial moisture. Dry leaves or shredded cardboard separate those ingredients, hold air channels open, and supply carbon for microorganisms.
Gardeners call nitrogen-rich inputs greens and carbon-rich inputs browns, though color can mislead. Brown coffee grounds count as greens because they supply nitrogen, while dry tan leaves count as browns because they contain more carbon.
A Practical Green and Brown Mix
A carbon-to-nitrogen ratio near 25 to 30 parts carbon to 1 part nitrogen suits an active pile. Your home setup does not need laboratory scales. Start with two to three buckets of browns for each bucket of greens, then judge the mix by texture and smell.
| Material group | Common examples | Role in the pile |
|---|---|---|
| Greens | Vegetable peels, fruit scraps, coffee grounds, fresh grass | Supply nitrogen and moisture for microbial growth |
| Browns | Dry leaves, shredded paper, cardboard, straw, small twigs | Supply carbon, absorb excess water, and hold air channels |
| Coarse bulking material | Wood chips, corn stalks, coarse leaf pieces | Stops dense ingredients from packing together |
Your pile needs extra browns after a heavy week of salad scraps, watermelon rinds, or lawn clippings. Add greens after a heap becomes dry, pale, and slow despite feeling lightly damp in your hand.
Five Backyard Inputs Stay Out of the Pile
Meat, dairy, oils or greasy foods, pet waste, and diseased plants belong outside a basic home system. These inputs can draw animals, cause strong odors, carry pathogens, or survive temperatures that a small pile never reaches.
- Skip meat scraps: Animal proteins smell quickly and can attract raccoons, rats, and neighborhood pets.
- Skip dairy foods: Cheese, yogurt, and milk bring similar odor and pest pressure.
- Skip oily leftovers: Grease coats materials and slows water and air movement through the pile.
- Skip pet waste: Dog and cat feces can contain parasites that do not belong near food gardens.
- Skip diseased plants: A cool pile can leave plant pathogens alive for a later garden bed.
Municipal organics collection can accept more materials than a backyard bin because commercial facilities handle larger volumes, controlled heat, and screening equipment. Check local program rules before placing compostable cups, coated paper, or plant-based packaging in your collection container, since ASTM D6400 labeling does not mean an item will break down in your yard.
Home Composting Systems Match Different Spaces
Your setup should match the scraps and space available each week. A household with oak leaves and vegetable peelings needs a different arrangement from an apartment kitchen without an outdoor corner.
| System | Works well for | Main trade-off |
|---|---|---|
| Open backyard heap | Large volumes of leaves and yard trimmings | Needs outdoor room, and a tidy edge can be hard to keep |
| Enclosed bin | Small yards and food scraps needing better pest control | Turning material takes more effort through a narrow opening |
| Tumbler | Frequent mixing and compact outdoor spaces | Small volume cools quickly and fills fast with yard waste |
| Vermicomposting | Indoor food scraps from small households | Worms need steady moisture and mild temperatures |
| Municipal collection | Renters and homes without outdoor space | Accepted liners and packaging rules vary by location |
A countertop scrap container holds material for a day or two, but it does not compost anything. Empty your container into an outdoor system, worm bin, or local drop-off location before moisture and fruit flies become a kitchen problem.
Vermicomposting uses red wigglers rather than ordinary garden earthworms because red wigglers thrive in shallow organic bedding. Your worm bedding can include shredded plain paper, damp coconut coir, and a small amount of crushed eggshell for grit.
Municipal instructions are the final word on accepted material. A compostable fork or bag can need commercial heat and can contaminate a program that accepts food scraps only.
Layering and Turning Keep the Pile Aerobic
Good drainage stops the bottom layer from becoming a waterlogged plug. Place an outdoor bin on bare soil or another draining surface, away from low spots where rain collects.
A Simple Start Sequence
- Lay down browns: Spread a loose 4- to 6-inch layer of dry leaves, shredded cardboard, or straw.
- Place greens above: Put food scraps and fresh yard material over the brown base in a thinner layer.
- Cover fresh scraps: Bury food under browns so exposed peelings do not attract flies.
- Moisten dry layers: Wet dry materials until they feel like a wrung-out sponge rather than dripping.
- Turn the center: Move the center outward and the outer edges inward to restore oxygen.
- Repeat the layers: Continue filling the bin until it reaches a workable volume for your space.
Your materials shrink during the active phase. A bin that looks full after yard cleanup can lose half its height as microorganisms consume carbon and water leaves as vapor.
Smaller Pieces Break Down Faster
Chopped material breaks down faster because microorganisms reach more surface area. Cut a corn stalk into short lengths, tear cardboard into strips, and split a thick cabbage core before placing it in the pile.
Turn contents every one to three weeks during warm weather for faster results. A fork or shovel loosens dense pockets, moves dry edges toward the moist center, and redistributes ingredients that settled into layers.
After active heat fades, stop feeding that batch and leave it to cure. Curing takes several weeks or longer, and fungi plus slower organisms continue stabilizing compounds that can stress seedlings in unfinished compost.
Because curing continues after active heating stops, a finished batch cannot be judged by the calendar alone.
Timelines Depend on Heat, Size, and Care
A hot, well-fed heap can produce usable material in roughly two to four months, followed by curing time. A cold pile that receives scraps without regular turning can take six months to a year or longer, especially through winter.
Size changes the pace. A heap about 3 feet wide, 3 feet deep, and 3 feet tall holds heat better than a thin layer in a small container. Chopped ingredients and routine aeration shorten the wait.
Heat Helps but Does Not Prove Success
Sustained internal heat near 131 to 160 degrees Fahrenheit can reduce many weed seeds and plant pathogens. Your home pile might not reach or hold that range, so keep invasive weeds with seed heads and diseased tomato vines out of a casual backyard system.
Temperature is a clue, not a grade. A cool pile still makes compost, but it moves more slowly. Your senses give clearer day-to-day feedback than chasing one thermometer number.
Symptoms Show the Needed Correction
| What you see or smell | Likely cause | Exact correction |
|---|---|---|
| Sour or rotten odor | Wet, compacted material lacks oxygen | Turn it, mix in dry leaves, and loosen clumps |
| Wet and slimy texture | Too many greens or heavy rain | Mix in shredded cardboard and cover the top |
| Dry, unchanged scraps | Too little moisture for microbial activity | Sprinkle water while mixing until lightly damp |
| Cold and slow center | Small volume, low nitrogen, or winter weather | Put in greens, gather more material, and wait for warmth |
| Fruit flies near scraps | Food remains exposed near the surface | Bury scraps under 2 inches of browns |
| Rodent activity | Animal foods or easy entry points | Remove prohibited inputs and switch to a secure enclosed bin |
Change one condition at a time, then inspect the result after several days. You learn more from a drier smell after adding leaves than from putting in water, grass, and cardboard all at once.
Finished Compost Is Ready After It Cools and Crumbles
Apple peels, leaf shapes, and coffee filters should be hard to spot in mature material. Finished compost feels loose and crumbly, smells earthy, stays cool near the center, and ranges from dark brown to nearly black.
A Readiness Check Before Soil Use
- Check temperature: Put compost in soil after it stays close to the surrounding air temperature.
- Check the smell: An earthy scent signals stability, while a sour odor means more aeration or curing is needed.
- Check texture: Mature material crumbles between your fingers instead of forming slick or sticky clods.
- Screen large pieces: Remove sticks, avocado pits, and visible scraps, then return them to the active bin.
- Protect seedlings: Give young seedlings fully cured material rather than a warm batch still breaking down.
Your finished compost works best as a soil amendment rather than the full growing medium. Mix 1 to 3 inches into a garden bed, spread a thin layer over a lawn, blend a modest portion into container soil, or top-dress houseplants with less than 1 inch.
For a tomato bed, work compost into the top several inches before planting, then place a light surface layer around established plants. Avoid burying stems beneath a thick wet layer, since damp material pressed against stems can hold too much moisture.
Steady Observation Keeps Each Batch Moving
Composting succeeds because microorganisms receive a balanced meal, oxygen, and sponge-like moisture. Keep a dry-brown supply beside your scrap container, watch for changes in smell or texture, and make one small correction at a time.
That steady attention answers how composting works in a real home. Your pile will change through winter, rain, lawn cleanup, and imperfect batches, yet the same basic conditions keep decomposition moving.
FAQ
How long does it take for compost to decompose?
An actively turned hot pile can produce usable compost in two to four months, then needs several more weeks of curing. Your low-maintenance pile can take six months to a year or longer because cooler temperatures, large pieces, and limited aeration slow microbial activity.
What are five items that should not be composted?
Keep meat, dairy products, oils or greasy foods, pet waste, and diseased plants out of a basic backyard compost system. These materials can attract animals, cause strong odors, introduce pathogens, or remain unsafe because your pile might not stay hot enough for long enough.
What is the right mix of greens and browns for compost?
Start with two to three volumes of carbon-rich browns for every volume of nitrogen-rich greens. Your pile should feel damp and springy, not slimy or dusty, so put in browns for wet odor and water plus greens for a dry, stalled batch.
How does composting work step by step?
Start with a loose brown base, place food scraps and other greens above it, cover them with browns, and moisten the mix to a wrung-out-sponge feel. Turn the material every one to three weeks, then leave the cooled batch to cure before placing it around plants.
What are five disadvantages of composting?
Composting needs space, dry browns, occasional labor, patience, and attention to moisture. Your pile can slow in winter, smell after excess wet greens, attract pests after prohibited food additions, or remain unfinished for months without enough volume, air, and warmth.