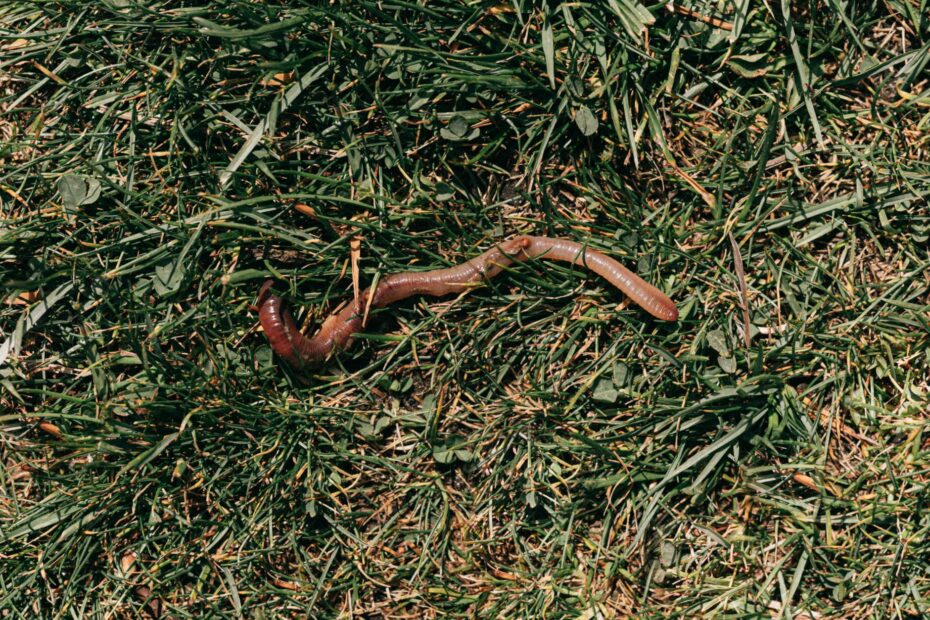
Inside a worm bin, composting worms, microbes, moisture, oxygen, and kitchen scraps produce dark worm castings through living decomposition. Your banana peel softens as microbial activity grows, then red wiggler worms (Eisenia fetida) consume the softened material and leave stable organic matter for soil.
This practical overview covers worm-bin biology, bedding materials, feeding, moisture levels, harvest methods, setbacks, and soil use for your apartment, garage, or sheltered porch setup.
Microbes and Worms Turn Scraps Into Castings
A fresh apple core is too firm for worms to process quickly. Bacteria, fungi, and other microbes soften plant cells after you bury food in damp bedding. That microbial growth starts the food web inside your worm bin.
Vermicomposting uses worms and microorganisms to process food scraps and organic materials. Red wiggler worms (Eisenia fetida) consume dense microbial growth, softened food particles, and bedding fragments. Their gut mixes that material before it leaves as worm castings.
Microbes Soften Food Before Worms Feed
Microbes handle much of the chemical work. They digest sugars, starches, and soft plant tissue through aerobic decomposition, which needs oxygen. Your worms feed where microbial activity is strongest rather than consuming fresh scraps like tiny garbage disposals.
A buried melon rind can sit untouched for several days, then shrink fast after its flesh softens. Food needs time to become worm-ready, especially in a new bin with a small microbial population. Your feeding pace should leave room for that early breakdown.
Castings Look Different From Soil and Scraps
Finished worm castings look dark brown to nearly black, crumbly, and earthy. They contain stabilized organic matter rather than bright pieces of carrot, citrus peel, or paper. Your finished material should smell like damp forest soil rather than sour leftovers.
| Stage | What happens | What you see |
|---|---|---|
| Fresh scraps | Moisture enters plant tissue and microbes begin colonizing it. | Recognizable peels, stems, or grounds. |
| Softening food | Microbial activity loosens cells and feeds worms. | Faded color, softer texture, and smaller volume. |
| Worm digestion | Worms ingest microbes, particles, and bedding fragments. | Food edges disappear near active worms. |
| Mature castings | Digested material stabilizes into fine organic particles. | Dark, granular material with few food remnants. |
A cup of chopped zucchini buried beneath shredded cardboard can become hard to recognize within two to three weeks in an active setup. That pace rests on habitat quality, beginning with the right worms and bedding materials.
Red Wigglers and Bedding Form a Stable Habitat
Surface-dwelling worms thrive where decaying leaves and food collect in shallow layers. Red wigglers, known scientifically as Eisenia fetida, suit containers because they live near the surface, reproduce in rich organic material, and tolerate close quarters.
Garden earthworms belong in garden soil, where they tunnel deeply and seek mineral earth. Your yard worm can survive briefly in a container, yet it is poorly suited to a shallow, food-rich habitat.
Bedding Holds Moisture, Air, and Carbon
Shredded office paper, torn corrugated cardboard, coconut coir, and dry leaves form the working body of the habitat. Bedding gives worms shelter, absorbs liquid, and supplies carbon that offsets nitrogen-rich food scraps.
Your bedding should feel like a wrung-out sponge. A handful should feel cool and damp without releasing a stream of water. That texture leaves air pockets between fibers and keeps decomposition aerobic.
- Shredded paper: Use plain, non-glossy paper in loose strips that hold moisture without packing tightly.
- Corrugated cardboard: Tear it into small pieces for durable air pockets and slow-release carbon.
- Coconut coir: Moisten it fully, then mix it with paper so it does not form a dense layer.
- Dry leaves: Crumble clean leaves into bedding for outdoor systems sheltered from heavy rain.
- Crushed eggshells: Add a small handful monthly for grit and a modest buffer against acidity.
Keep the habitat shallow and loose. A deep, wet mass can become oxygen-poor at the bottom while the surface still looks dry.
Moderate Conditions Reduce Common Problems
A worm bin needs ventilation holes, loose bedding, and temperatures close to normal indoor conditions. Red wigglers slow in cold weather and can suffer in heat. A shaded basement, utility room, or protected garage gives your colony steadier conditions than a hot patio.
Vermicomposting has limits. Your container needs regular attention, handles a modest stream of scraps, and can attract fruit flies after careless feeding. Heat waves, freezing weather, and vacation periods also need a plan.
Those trade-offs become manageable after your container matches the amount of food entering it. An oversized feeding habit causes more trouble than a modest worm population.
Bin Size Sets Limits Before Food Goes In
Surface area matters more than depth because worms feed near the top layer. A wide tote with 8 to 12 inches of material gives your colony access to food and air, while a tall narrow bucket can trap moisture below.
Start with scraps your household can separate cleanly rather than every peel and leftover from a week. A small apartment setup suits vegetable trimmings, coffee grounds, tea leaves, and fruit scraps from a few meals.
| Household pattern | Suggested bin footprint | Starting worms and food |
|---|---|---|
| One person, light scraps | About 12 by 18 inches | 250 to 500 red wigglers; 1 to 2 cups of scraps weekly. |
| Two people, steady cooking | About 18 by 24 inches | 500 to 1,000 red wigglers; 2 to 4 cups weekly. |
| Small household, frequent produce prep | About 24 by 36 inches | 1,000 worms; 4 to 6 cups weekly during startup. |
| Heavy scrap volume | Two separate shallow bins | Split food between colonies rather than crowding one container. |
Starting Capacity Leaves Room for Observation
Your colony does not need to match a bin’s full capacity on day one. Fill roughly half the container with damp bedding, then add a restrained amount of food. The open upper space improves airflow and leaves room for fresh carbon.
A group of 1,000 worms can process very different amounts from one home to another. Temperature, worm maturity, bedding quality, and food particle size alter the result. Your feeding record gives a more useful number than a fixed pounds-per-week claim.
Moisture, temperature, oxygen, pH balance, and carbon-to-nitrogen balance shape worm activity. That matches guidance from Oklahoma State University Extension and explains why bin size alone cannot predict output.
Start with less food than your scraps suggest. A colony that finishes its meal is ready for more, while a colony buried under food loses air fast.
Space and bedding set physical limits. The opening month reveals how quickly your colony can process food inside those limits.
The Opening Month Builds a Productive Bin
Worms can disappear into bedding within minutes of entering a calm, dark container. That behavior shows they are seeking moisture and shelter rather than trying to escape. Your job during the first days is to leave the habitat stable.
The Opening Week Needs Minimal Disturbance
- Moisten bedding: Add water gradually until fibers feel damp and springy, with no puddle at the base.
- Add worms: Place red wigglers on top, leave the lid ajar or vented, and allow them to burrow down.
- Bury one meal: Place 1 to 2 cups of chopped scraps in one corner beneath bedding.
- Leave it alone: Check moisture after several days, but avoid stirring the full container during adjustment.
Your worms need time to settle after shipping, transport, or relocation. A small feeding pocket gives microbes a place to multiply without turning the full bin into a wet food layer.
Food Volume Rises With Visible Activity
During weeks two through four, inspect the original feeding pocket every four to seven days. Add another small portion after earlier scraps are soft, reduced, and surrounded by active worms. Your restraint gives the colony time to match the food supply.
| Time period | What to do | Healthy sign |
|---|---|---|
| Days 1 to 7 | Offer one small buried meal. | Worms stay below the bedding surface. |
| Week 2 | Check the food pocket and add dry paper as needed. | Scraps soften without sour odor. |
| Weeks 3 to 4 | Rotate small meals across the surface. | Food volume declines between feedings. |
| Months 2 to 4 | Feed according to actual disappearance rate. | Dark granular material begins filling older areas. |
A new system processes scraps more slowly than a mature one. Food can take two to four weeks at the start, while an established colony in suitable conditions can handle a small feeding in several days. Your nose is part of the inspection: earthy smells healthy, while sharp or rotten odor signals stress.
Once scraps vanish at a steady pace, food choice becomes the main control over odors, flies, and moisture levels.
Balanced Feeding Keeps Food Aerobic
Small chopped portions disappear faster than whole peels because more surface is exposed to microbes. Freeze and thaw watery scraps such as melon rind or squash ends before feeding, then mix them into dry cardboard rather than dropping them in a wet clump.
Food Choices Shape Bin Conditions
| Input group | Examples | Portion and preparation |
|---|---|---|
| Suitable foods | Vegetable scraps, fruit scraps, tea leaves, coffee grounds | Chop small and bury modest portions beneath bedding. |
| Useful amendments | Crushed eggshells, soaked paper filters | Add small amounts mixed through bedding or food pockets. |
| Limited foods | Citrus, onions, garlic, spicy peppers | Use sparingly and spread across several feedings. |
| Foods to avoid | Meat, dairy, oily foods, salty leftovers | Keep them out because odors, pests, and sour conditions follow. |
Coffee grounds and tea leaves fit a worm diet in modest amounts, but neither replaces bedding. Grounds can pack together, so mix them into torn cardboard. Your carbon layer absorbs water and keeps food from forming a dense paste.
Large quantities of citrus can lower pH balance and irritate the habitat. Meat, cheese, grease, and heavily salted takeout attract flies and produce odors long before worms can process them. Your kitchen compost caddy needs clear boundaries.
Feeding Habits Protect Air Spaces
- Chop scraps small: Pieces under 1 inch soften faster and leave fewer exposed surfaces for flies.
- Bury each portion: Cover food with at least 2 inches of bedding to reduce odor and fruit fly access.
- Rotate locations: Move feeding pockets around the container so no area becomes compacted and sour.
- Add dry carbon: Place shredded paper beside wet produce scraps to absorb released liquid.
- Wait for progress: Feed again after most of the prior portion loses its recognizable shape.
- Keep a lid: Use a loose, ventilated cover that blocks light while allowing gas exchange.
Do not pour liquid from rinsed produce into the container. Wet food already releases water as cells collapse, and excess liquid can drown the air spaces your colony needs.
What to feed composting worms depends on visible evidence rather than a strict calendar. Food remains in place, moisture rises, and air spaces close after additions exceed what microbes and worms can process.
Moisture, Airflow, and Temperature Control Bin Health
A sour smell starts below the surface, where wet food compresses into an oxygen-poor pocket. Anaerobic conditions produce gases that stress worms and draw them upward toward the lid. Your correction begins with removing excess food and loosening compacted bedding.
Visible Symptoms Point to Specific Conditions
Wet bedding looks shiny, heavy, and muddy. Dry bedding looks dusty and pulls away from container sides. Your worms become sluggish in either extreme because their skin needs moisture for gas exchange, yet their habitat also needs air.
Heat sends worms toward cooler edges or out of the container. Cold slows feeding and reproduction. A sharp acidic smell, clusters of tiny white mites, and untouched food can point to excess wet produce or a pH shift.
Five Errors Cause Most Worm-Bin Trouble
- Overfeeding scraps: Excess food heats, sours, and consumes oxygen before worms can reach it.
- Skipping bedding: Food without carbon turns dense and wet, leaving few sheltered travel paths.
- Sealing ventilation: An airtight lid traps moisture and limits oxygen needed for aerobic decomposition.
- Standing liquid: Waterlogged material collapses air spaces and forces worms away from the base.
- Temperature extremes: Direct sun, freezing garages, and hot carports can injure or kill a colony.
Fruit flies respond to exposed food rather than the worms themselves. Cover scraps, wipe the rim, and place a sheet of damp newspaper over the bedding. Your colony stays darker and flies lose easy access to fermenting fruit.
Worms climbing during the opening days can reflect relocation stress or bright conditions rather than disaster. Persistent wall climbing paired with odor or puddles needs a correction matched to the symptom.
Troubleshooting Restores a Stressed Worm Bin
Most bin failures come from excess food and moisture rather than too few worms. Stop adding scraps before trying more complicated corrections. That pause gives microbes, worms, and air spaces time to recover.
| Symptom | Probable cause | Direct correction |
|---|---|---|
| Rotten or sour smell | Overfed, compacted food without oxygen | Remove spoiled scraps, fluff bedding, and pause feeding. |
| Fruit flies | Exposed produce or scraps near the lid | Bury food deeply, add paper, and clean the rim. |
| Soggy bedding | Too much watery food or poor drainage | Add dry shredded cardboard and remove pooled liquid. |
| Worms on walls | Stress from light, acidity, heat, or low oxygen | Check moisture, remove food, and move the container to a steadier site. |
| Slow food loss | Cold conditions, large pieces, or a young colony | Chop smaller portions and wait before raising food volume. |
| Worm deaths | Severe heat, flooding, salt, or severe acidity | Remove the source, add fresh moist bedding, and moderate temperature. |
Startup Calls for Patience
A few worms near the lid during the first several nights do not always signal a failed setup. Leave a light above the container for one evening, confirm that bedding is damp rather than saturated, and give the colony time to settle.
Slow decomposition also needs context. A cool basement in winter can stretch a food cycle for weeks, even with healthy worms. Your response should match the evidence rather than the urge to stir, feed, or relocate the colony repeatedly.
Remove food that smells rotten or has turned slimy and compacted. Soft scraps with active worms nearby are part of normal processing.
After a stable rhythm returns, older bedding darkens into material ready for separation. Harvesting keeps the container from filling with finished castings and restores room for fresh bedding.
Harvesting Castings Returns Organic Matter to Soil
Dark, crumbly material with few recognizable scraps signals a mature section. Your goal is to remove finished castings while leaving worms, cocoons, and partly decomposed bedding behind for continued processing.
Harvest Methods Fit Different Bin Styles
| Method | How it works | Suitable situation |
|---|---|---|
| Side-to-side migration | Feed one side for several weeks and harvest the quieter side. | Wide containers with room for fresh bedding. |
| Light sorting | Place material in small mounds under light and remove exposed castings gradually. | Small batches with visible worms. |
| Screening | Pass dry-leaning material through a coarse screen and return larger bits to the bin. | Castings intended for fine potting mixes. |
Side-to-side migration is the least disruptive harvest method for your colony. Add fresh bedding and food to one end, then leave the opposite end unfed. Worms move toward the new meal, allowing you to scoop darker material from the old zone.
Screened castings should feel moist enough to clump lightly, not wet enough to smear. Store them in a breathable container out of direct sun. A sealed, soaking bag can become anaerobic and lose its pleasant earthy smell.
Castings Work Best Mixed Into Soil
Worm castings are a soil amendment rather than a complete potting medium. Blend them into existing soil or potting mix so roots still have air, drainage, and structural particles. Your plants receive organic matter without losing the texture their roots need.
- Houseplants: Top-dress with a thin layer, then water gently so particles settle into the surface.
- Container mixes: Mix about 10 to 20 percent castings into potting soil before planting.
- Garden beds: Spread a light layer across the planting area and mix it into upper soil.
- Established plants: Place a ring around the root zone without pressing castings against stems.
- Seedling mixes: Use a restrained share with sterile starting mix to retain drainage and reduce density.
How to use worm castings depends on the crop and soil texture. Vermicompost tea deserves restraint because water extracted from castings does not carry the same predictable qualities as solid material. Your safest routine is placing solid castings directly in soil mixes.
Space and Scrap Volume Shape Composting Choices
| Method | Strong fit | Main limitation |
|---|---|---|
| Vermicomposting | Indoor scraps, limited outdoor space, steady small food volume | Needs regular moisture, food, and temperature attention. |
| Backyard composting | Yard waste, larger volumes, outdoor space | Needs room and can work slowly in cold weather. |
| Municipal organics collection | Meat, dairy, oily leftovers, and large household volumes | Depends on local pickup access and accepted materials. |
Vermicomposting vs composting is not a contest with one universal choice. Your worm bin suits small, steady kitchen scraps and close attention. A backyard pile suits leaves and garden trimmings, while municipal collection suits foods that would destabilize a household worm habitat.
Final Thoughts
Your container succeeds because it functions as a small ecosystem rather than a storage box for scraps. Feed less than your kitchen produces, keep bedding damp and airy, and watch food disappear before adding more. That rhythm turns food scraps into dark, crumbly worm castings for your soil.
FAQ
How does vermicomposting work?
Red wiggler worms and microbes break down food scraps into nutrient-rich castings. Microbes soften food scraps through aerobic decomposition, worms consume softened particles and microbial growth, and their digestion leaves dark worm castings. Your bedding supplies moisture, air pockets, and carbon throughout that process.
What do composting worms eat, and which foods should stay out of a worm bin?
Composting worms feed on softened vegetable scraps, fruit scraps, coffee grounds, tea leaves, paper, cardboard, and microbial growth. Keep meat, dairy, oily foods, and salty leftovers out of your worm bin because they create odors, attract flies, and can form sour wet pockets.
What kind of worms are best for vermicomposting?
Red wiggler worms, scientifically known as Eisenia fetida, suit worm bins because they live near the surface and thrive in decaying organic material. Your garden earthworms are less suited to a shallow container because they prefer mineral soil and deeper tunnels.
How long does it take worms to make usable compost?
Your new container can need two to four weeks to process a small feeding while worms and microbes settle in. A mature colony in suitable conditions can reduce chopped produce scraps within several days to two weeks, while full harvest material takes longer.
How do you know whether a worm bin is too wet, too dry, or overfed?
Wet bedding looks shiny, muddy, and heavy, while dry bedding looks dusty and pulls away from container sides. Your overfed bin can smell sour, hold untouched food, or draw worms toward the lid. Add dry cardboard for excess moisture and pause feeding until food volume drops.
What are the downsides of vermicomposting?
Your bin needs steady attention to moisture, airflow, temperature, and food volume. It also handles less material than a backyard pile, and poor feeding habits can lead to fruit flies, odors, escaping worms, or a soggy container.